Authoring htmlwidgets powered by React with reactR
Alan Dipert
Carson Sievert
2024-09-14
Source:vignettes/intro_htmlwidgets.Rmd
intro_htmlwidgets.RmdThe htmlwidgets package provides a framework for creating R bindings to JavaScript libraries. Using the htmlwidgets package alone, it’s not necessarily straight-forward to create an R binding to a React-powered JavaScript library. The reactR package builds on the htmlwidgets framework to make it much easier to author htmlwidgets that are powered by React. This vignette will show you how to effectively leverage reactR to build an htmlwidgets package that interfaces with react-sparklines React JavaScript library.
Software pre-requisites
In order to develop a reactR widget, you’ll need to install R and optionally RStudio. If you’re on Windows, you should also install Rtools.
For an excellent general introduction to R package concepts, check out the R packages online book.
In addition, you’ll need to install the following JavaScript tools on your machine:
-
Node.js: JavaScript engine and
runtime for development outside of browsers. Provides the
nodeandnpmcommands. -
Yarn: Command-line
dependency management tool, provides the
yarncommand.
To follow along in this vignette, you’ll also need the following R packages:
install.packages(c("shiny", "devtools", "usethis", "htmlwidgets", "reactR"))Scaffolding
To create a new widget you can call scaffoldReactWidget
to generate the basic structure and build configuration. This function
will:
- Create the .R, .js, .yaml, and .json files required by your widget;
- If provided, take an npm
package name and version as a named list with
nameandversionelements. For example, the npm packagefooat version^1.2.0would be expressed aslist(name = "foo", version = "^1.2.0"). The package, if provided, will be added to the new widget’spackage.jsonas a build dependency.
The following R code will create an R package named
sparklines, then provide the templating for creating an
htmlwidget powered by the react-sparklines npm package:
# Create the R package
usethis::create_package("~/sparklines")
# Inject the widget templating
withr::with_dir(
  "~/sparklines",
  reactR::scaffoldReactWidget("sparklines", list("react-sparklines" = "^1.7.0"), edit = FALSE)
)
Building and installing
Building the JavaScript
The next step is to navigate to the newly-created
sparklines project and run the following R commands:
yarn installdownloads all of the dependencies listed inpackage.jsonand creates a new file,yarn.lock. You should add this file to revision control. It will be updated whenever you change dependencies and runyarn install. Note: you only need to run it after modifying package.json. For further documentation onyarn install, see the yarn documentation.yarn run webpackcompiles the ES2015 JavaScript source file atsrcjs/sparklines.jsintoinst/htmlwidgets/sparklines.js. The later file is one actually used by the R package and includes all the relevant JavaScript dependencies in a version of JavaScript that most browsers understand. Note that, if you add--mode=developmentto the end of this command, it will include a source map is included with the compiled JavaScript, which makes JavaScript debugging much easier, but hopefully you won’t need to do much of any JavaScript debugging.
yarn run webpack is not strictly a yarn
command. In fact, yarn run simply delegates to the webpack program. Webpack’s
configuration is generated by scaffoldReactWidget in the
file webpack.config.js, but you can always change this
configuration and/or modify the yarn run webpack command to
suit your needs.
Run the included demo
Now that the widget’s JavaScript is compiled, and the R package is
installed, run app.R to see a demo in action:
shiny::runApp()Alternatively, in RStudio, you can open app.R and press
Ctrl-Shift-Enter (Cmd-Shift-Enter on macOS).
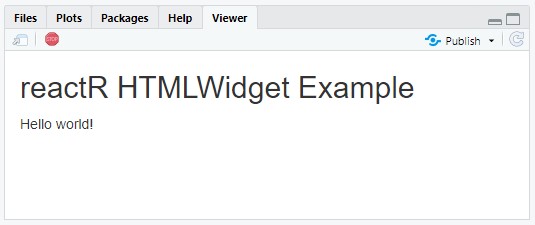
You should see something like the following appear in the Viewer
pane:
Authoring a React binding
At this point, we’ve built some scaffolding for an htmlwidget powered
by React. Let’s modify it to create an interface to the
react-sparklines library. Authoring the interface requires
some changes on both the JavaScript and R side, but most of the hard
thinking will be in figuring how best to design your interface. To give
you an example of how this could work, let’s build an interface to the
Sparklines component of the react-sparklines library.
First, outline an interface
Note that the examples in this section are just to demonstrate API possibilities and need not be pasted into any file.
Consider the following example taken from the react-sparklines documentation.
import React from 'react';
import { Sparklines } from 'react-sparklines';
<Sparklines data={sampleData}>
<SparklinesLine color="#56b45d" />
<SparklinesSpots style={{ fill: "#56b45d" }} />
</Sparklines>You have some choice in terms of how to design an R interface to this sort of React library, but usually it makes sense to have one function per component and have the arguments to that function feed into the properties of that React component. In other words, our goal is to create an R function that allows users of our package to recreate this example with the following code:
library(sparklines)
sparklines(
data = sampleData,
sparklinesLine(color = "#56b45d"),
sparklinesSpots(style = list(fill = "#56b45d"))
)The following sections show how to implement this R interface from our scaffolded widget.
R implementation
Consider the template that reactR::scaffoldReactWidget()
provided for us:
sparklines <- function(message, width = NULL, height = NULL, elementId = NULL) {
# describe a React component to send to the browser for rendering.
content <- htmltools::tag("div", list(message))
# create widget
htmlwidgets::createWidget(
name = 'sparklines',
reactR::reactMarkup(content),
width = width,
height = height,
package = 'sparklines',
elementId = elementId
)
}This function is designed to simply display a message within an HTML
div using reactR and htmlwidgets. The
critical piece here that makes it all work is
reactR::reactMarkup(). This function can prepare a payload
containing a mix of HTML tags (constructed via
htmltools::tag()), React components (constructed via
reactR::component()), or character vectors in a such way
that the reactR and htmlwidgets
toolchain will understand and know how to render in the browser
(assuming we’ve imported our React component appropriately, as we cover
later). Thus, to send a <Sparklines> react component
instead of an HTML <div>, we could simply change:
to
Remember, though, that we’d like <Sparklines> to
consume a data property and also accept other valid
components (e.g., <SparklinesLine>,
<SparklinesSpot>, etc) from this library as children.
So, we could change the body and signature of sparklines()
in the following way:
sparklines <- function(data, ..., width = NULL, height = NULL) {
# describe a React component to send to the browser for rendering.
content <- reactR::component(
"Sparklines",
list(data = data, ...)
)
# create widget
htmlwidgets::createWidget(
name = 'sparklines',
reactR::reactMarkup(content),
width = width,
height = height,
package = 'sparklines'
)
}At this point, we define functions that make it easy for the user to
create the other components by adding these to
R/sparklines.R
JavaScript changes
In order for the reactR toolchain to know how to
render components from the ‘react-sparklines’ library, we need to
register the React components on the JavaScript side. This can be done
in the srcjs/sparklines.js file which currently looks like
this:
First, reactWidget is imported
from the 'reactR' JavaScript module. This function will
register the React components we want within the reactR
and htmlwidgets toolchain. Note that the
'reactR' JavaScript is an html dependency, but webpack is
configured in webpack.config.js to consider it a module, so
it’s available to us here via import syntax.
Then, there’s a call to reactWidget, and we pass it
three arguments:
- The name of the widget (
'sparklines') - The type of the widget (
'output') - The React components that should be exposed to the widget. In this template, we didn’t have to include any because it’s just rendering an HTML div.
Instead of passing an empty object ({}) as the React
components, we provide an object with all the components we need from
the ‘react-sparklines’ module:
Go for a spin
Now that we’ve made the necessary changes to the JavaScript and R source code, it’s time to compile the JavaScript and install the R package:
system("yarn install")
system("yarn run webpack")
devtools::document()
devtools::install()
library(sparklines)
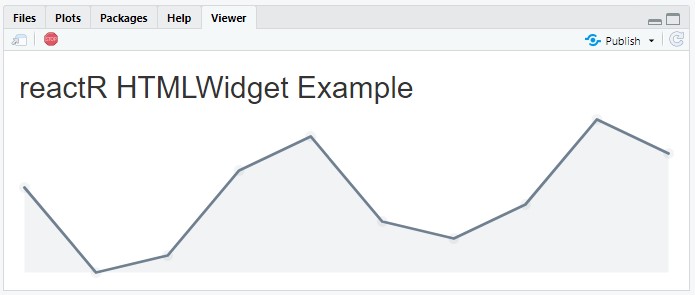
sparklines(rnorm(10), sparklinesLine())This should open up the sparklines() widget in your
browser. If it does, congratulations, you created a React-based
htmlwidget!
Shiny integration
The scaffolding template already provides the glue you need to get
your reactR widget to render in Shiny.
The two relevant functions are renderSparklines() and
sparklinesOutput(). You shouldn’t need to modify these
functions — they should work out of the box. You will, however, want to
modify the example Shiny app in the app.R
file:
library(shiny)
library(sparklines)

ui <- fluidPage(
  titlePanel("Sparklines library"),
  sliderInput("n", label = "Number of samples", min = 2, max = 1000, value = 100),
  sparklinesOutput("myWidget")
)

server <- function(input, output, session) {
    output$myWidget <- renderSparklines({
        sparklines(
            rnorm(input$n),
            sparklinesLine()
        )
    })
}

shinyApp(ui, server)
Now, when you run shiny::runApp(), you should see your
react-based htmlwidget rendering in shiny app!
Further learning
This tutorial walked you through the steps taken you create an R interface to the react-sparklines library. The full example package is accessible at https://github.com/react-R/sparklines-example. Our intention is keep creating example packages under the https://github.com/react-R organization, so head there if you’d like to see other examples of interfacing with React.